Contents
This is the first article in a series that explores GPIO programming on a Raspberry Pi 3B+. You can find the full series here. It is a supplement to the Sunfounder Blinking LED project. The code samples will be in Go and C.
Overview
I recently became interested in GPIO programming on a Raspberry Pi. It’s a nice way to see something concrete controlled by software. It’s also a nice way to learn a little bit about electronics. This is the first article in a series I intend to write to document my journey in GPIO programming.
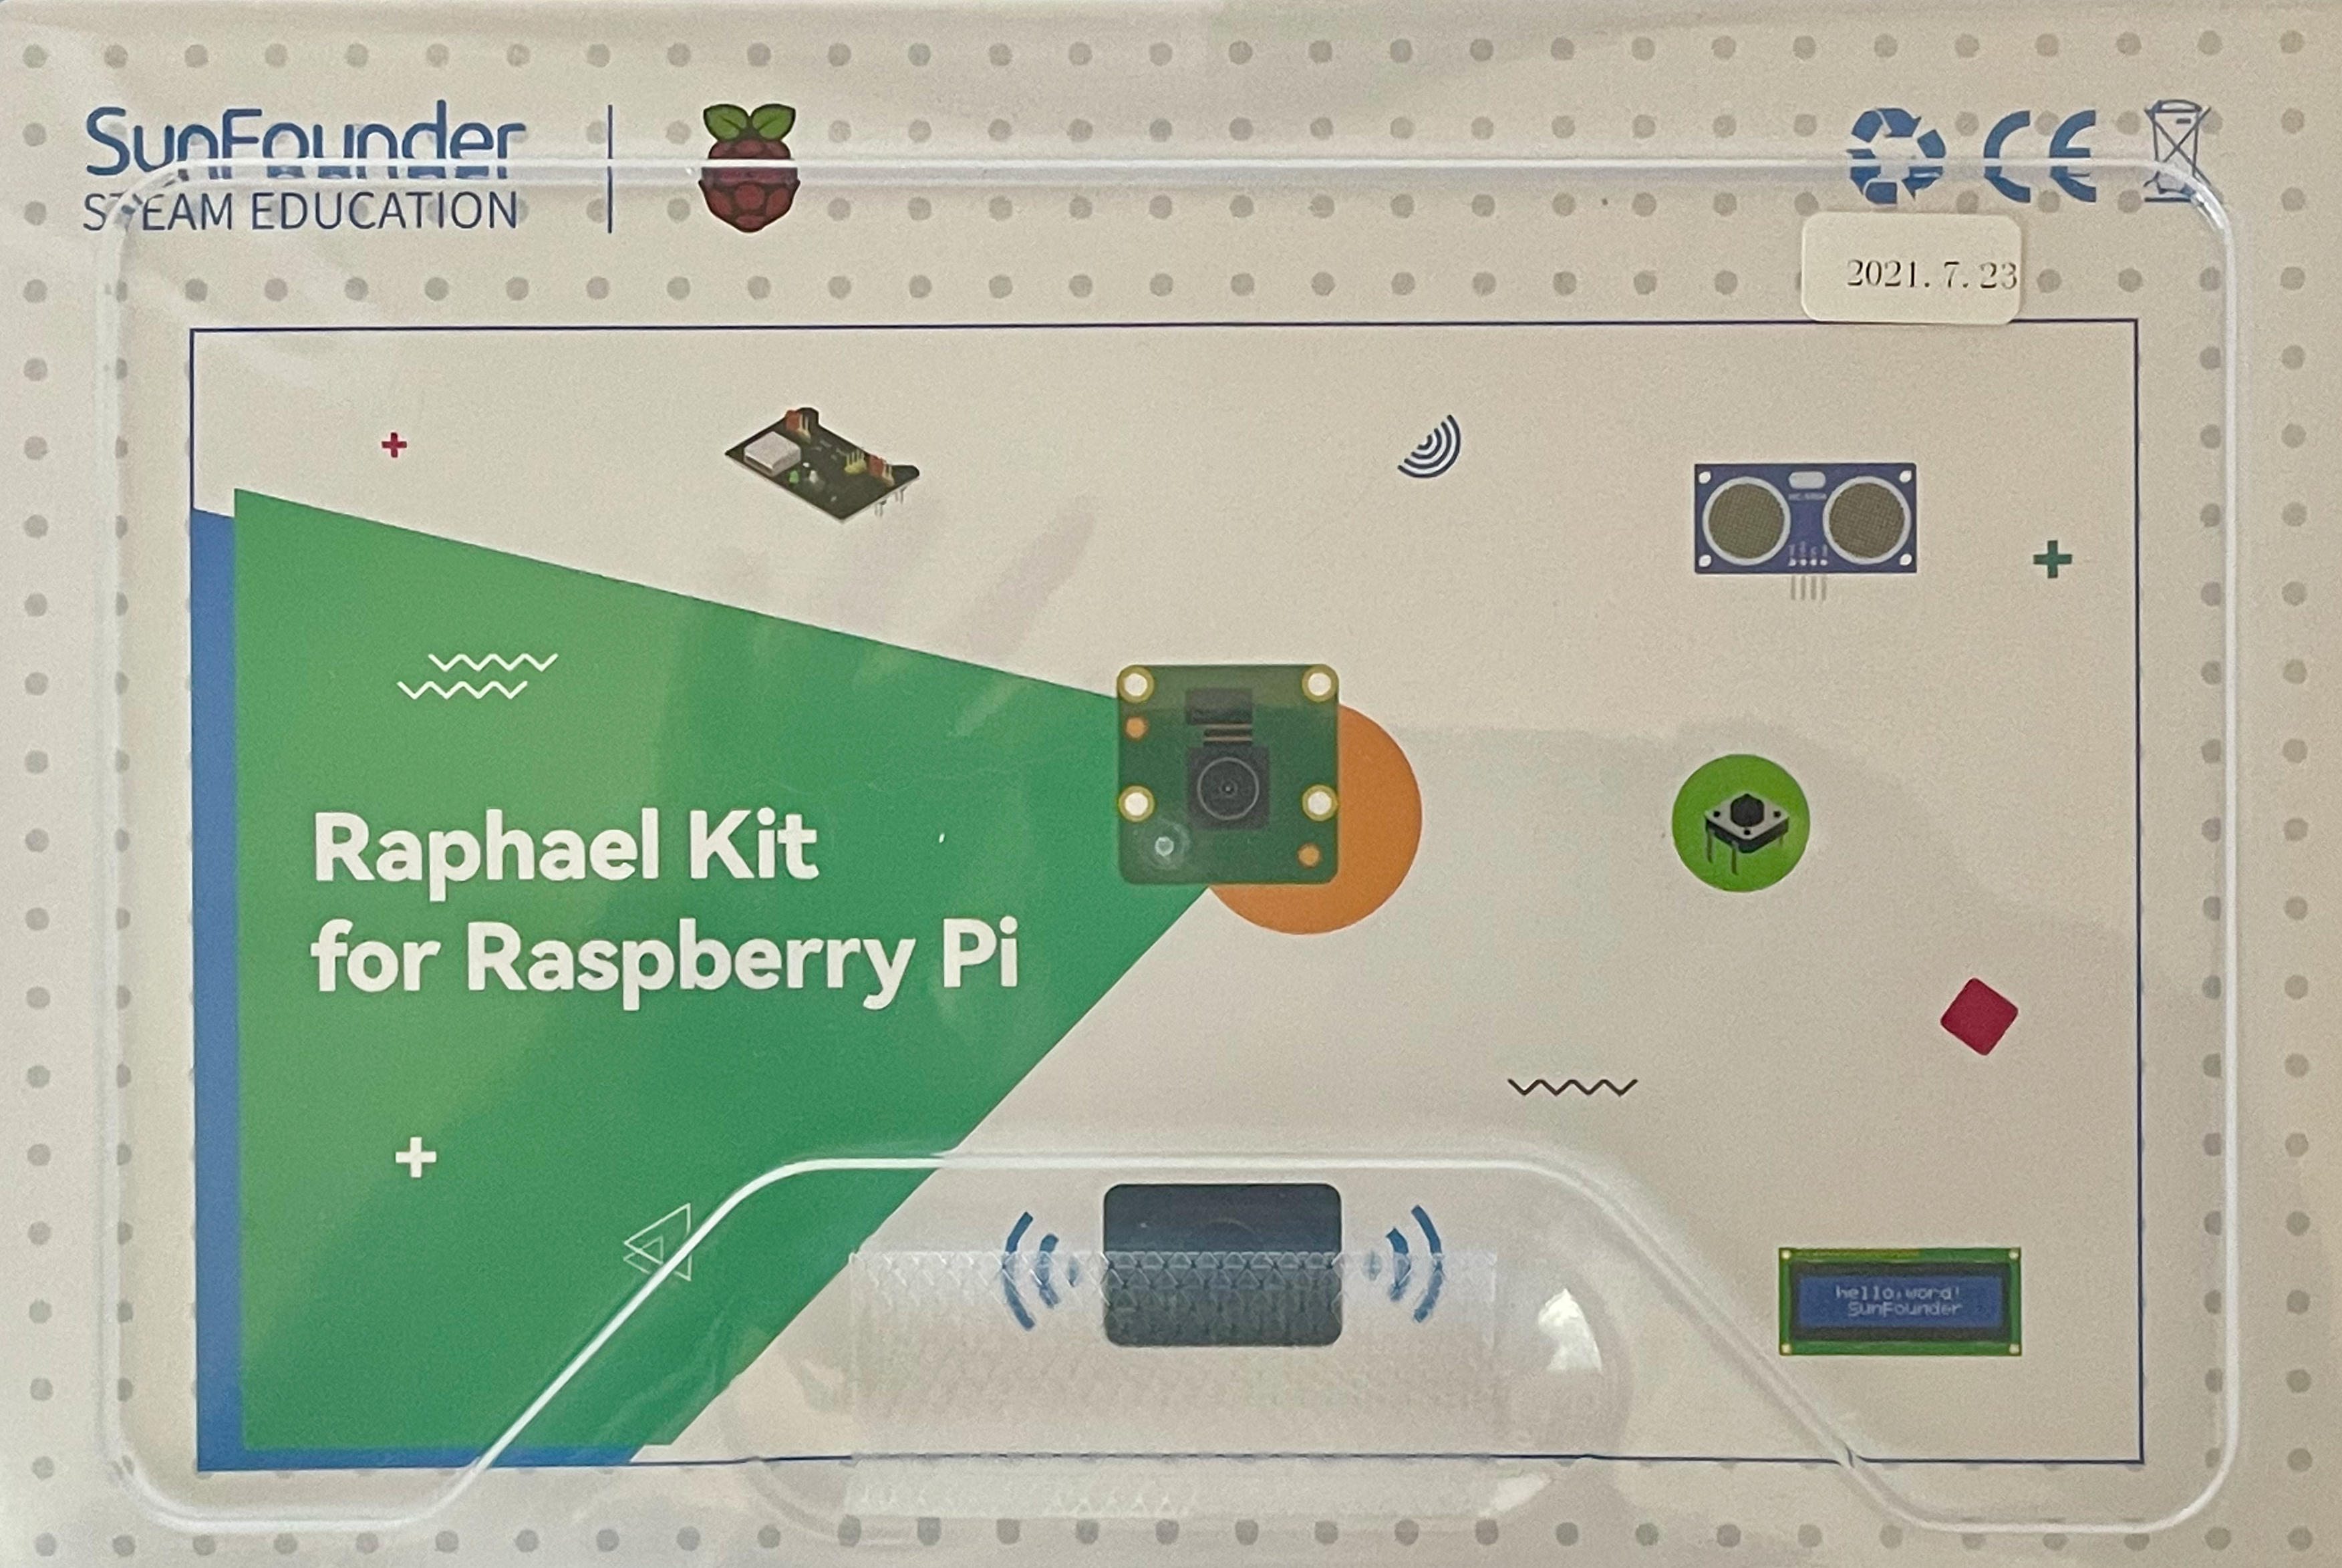
To lower the bar to getting started I decided to purchase a GPIO/electronics kit and repurpose one of my Raspberry Pis. I chose Sunfounder, mostly because they seem to be well regarded and their kits get good reviews. I ended up choosing the Sunfounder Raspberry Pi Ultimate Starter Kit (AKA Raphael) because it has a good number of interesting electronic components and associated projects.
One thing I noticed right away is that most GPIO articles assume Python for the programming language. Sunfounder’s kits and associated documentation support a number of languages including Python and C, but they lean towards Python and more projects are available in Python and not so many in C. I’m primarily a Go developer so I’m also interested in implementing GPIO projects in Go.
Some of the Sunfounder kit reviews mention that the project documentation is a little sparse and short on explaining how things work. I’m just getting started and I’ve seen a little of this, but the first project, Sunfounder Blinking LED project, is pretty well documented. I only got hung up in a couple of spots and it didn’t take long for me to figure out what I did wrong. The second project, RGB LED was a bit different. It’s more complicated and much less detailed regarding explaining how and why things work. If all you want to do is follow a cookbook to implement the project it works well enough. But it’s lacking if you want to understand how and why it works in more detail. I spent quite a while working on this one trying to fill in the information missing from the project documentation. The point of this series is to fill that gap, from both coding and electronic perspectives.
The focus of this article is the Sunfounder Blinking LED project. It’s the first project in a set of projects targeting the Ultimate Starter/Raphael kit.
Prerequisites
If you don’t have one, you’ll need a Raspberry Pi. I used a Raspberry Pi 3B+ with the ‘stretch’ version of the Raspbian OS. Given that the Sunfounder Ultimate Starter Kit is advertised to work with a Raspberry Pi 4, I would expect the 4 series to work as well. I’m less sure about other Raspberry Pi versions, especially versions with 26 vs. 40 GPIO pins.
Next you’ll need is a breadboard, some jumper wires, a 220 Ohm resistor, and an LED. You should also consider getting a 40 pin female to female with a T-Type adapter to attach the GPIO outputs to the breadboard. You can use only jumper wires, but the cable will make things easier and will help prevent damage to the GPIO pins on the Raspberry Pi. If you elect not to buy the 40 pin cable with T-Type adapter you’ll need to buy male-to-female jumper wires. Buying all these things separately will cost more than a kit however. Here’s a simple kit that has all of the above. If you expect to follow this series I recommend buying the Sunfounder Raspberry Pi Ultimate Starter Kit.
To compile and run the C program you’ll need the WiringPi libary. It’s easy to get:
sudo apt-get install wiringpi
Then test the installation using:
pi@pi-node1:~/go/src/github.com/youngkin/gpio/rgbled $ gpio -v
gpio version: 2.50
Copyright (c) 2012-2018 Gordon Henderson
This is free software with ABSOLUTELY NO WARRANTY.
For details type: gpio -warranty

Raspberry Pi Details:
  Type: Pi 3B+, Revision: 03, Memory: 1024MB, Maker: Sony
  * Device tree is enabled.
  *--> Raspberry Pi 3 Model B Plus Rev 1.3
  * This Raspberry Pi supports user-level GPIO access.
In the above you’ll notice gpio version: 2.50. If you’re using a Rasberry Pi 4, use the instructions given in the Sunfounder Checking the WiringPi.
You will also need some basic C and Go programming knowledge as well as familiarity with logging on to a Raspberry Pi terminal, or into the desktop GUI that comes with some OS versions. Depending on the approach you take, you may need to connect a keyboard and monitor to the Raspberry Pi. I simply SSH into the Pi. You’ll also need familiarity with how to use an editor like Vi or nano.
I chose not to download the code from the Sunfounder site, preferring to write my own instead, even if all I did was copy directly from the project documentation. Due to this I created my own location to create the code. In fact, my code is in Github. If you do like downloading code you have the option of downloading, cloning, or forking it from my Github repository. As an added bonus, the project code written in Go is also located there. The code for this project is located at gpio/ledblink.
If you’re interested in Go development on a Raspberry Pi you’ll need to install the development environment onto the Raspberry Pi. Here’s a simple source that explains how to accomplish this. This source is a little dated, but the only significant issue is with the version of Go to install. The source shows installing Go 1.14.4.linux-arm64.tar.gz and 1.14.4.linuxarmv6l.tar.gz. The current versions are 1.17.1.linux-arm64.tar.gz and 1.17.1.linuxarmv6l.tar.gz. For the Raspberry Pi 3B+ the correct choice will be 1.17.1.linuxarmv6l.tar.gz. The other is intended for 64 bit systems like the Raspberry Pi 4 series.
Finally, I’m assuming a basic knowledge of Linux if you want to veer away from the cookbook style of the Sunfounder docs. For example, I won’t be explaining what root privileges are.
Blinking LED in C
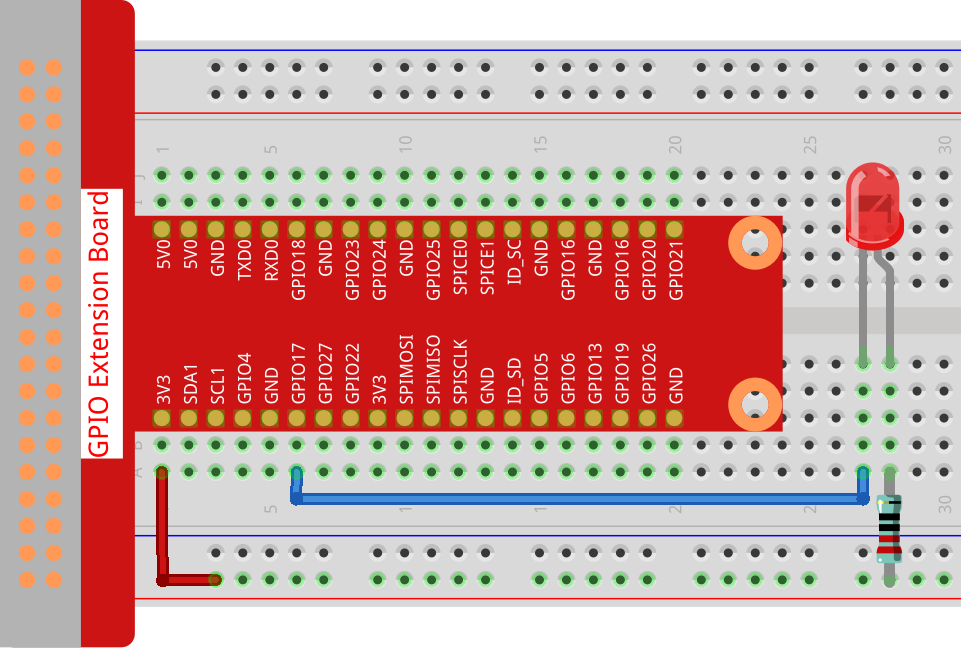
As mentioned above, this article is about the Blinking LED project. The Sunfounder documentation for this project is quite good. You should start with the Introduction and work your way through the following sections up to and including the Play with C section. You should set up the breadboard as described in the project documentation or in the diagram below:
Since the Sunfounder project documentation is so good, I only have a couple of comments.
Information that would have been helpful
The documentation for the project states “Therefore, to turn on an LED, we need to make GPIO17 low (0V) level.”. What it doesn’t explain is why. The reason is that the 220 Ohm resistor is connected on one side to a 3.3 volt power source and the LED anode (positive terminal) on the other. And GPIO17 is connected to the LED’s cathode (negative terminal). LEDs only illuminate when current flows from the anode to the cathode. GPIO pins on the Raspberry Pi, e.g., GPIO17, generally have a default state of HIGH (3.3 volts). With the connection of the 3.3 volt power source to the anode and the 3.3 volt GPIO17 pin on the cathode side, no current will flow through the circuit. So the LED will not turn on. Setting GPIO17 to LOW, 0 volts, allows the current to flow, lighting the LED.
This is a minor point, but the program does not need to be run with root (sudo) privileges. Simply running ./BlinkingLed, vs. sudo ./BlinkingLed, will work. This is not always true for GPIO programs. I’ll point that out when running a program that does require root privileges.
Blinking LED in Go
This version of Blinking LED will work with the same breadboard setup as the C version.
First things first, we need a Go library to drive the GPIO interface. I’m using go-rpio for several reasons:
- It seems to be in fairly wide use
- It seems to be fairly complete
- It’s relatively active
- It comes with example code and good documentation
- Its API is similar to WiringPi’s
Another option is periph (code) with documentation. It is more active and the documentation is very good, better than go-rpio. This project would be trivial to do using periph. Overall, for the LED examples I was able to find, go-rpio better matched what I was looking for, especially with regard to the RGB LED using Pulse Width Modulation (PWM, more on this in the next article in the series). But this is an excellent alternative to go-rpio and vice-versa.
You can just use the rpio-go blinker.go example. It uses rpio.Pin.Toggle(). I created a Github respository that contains examples in both C and Go. My Go version of blinker uses direct writes instead of rpio.Pin.Toggle. I thought showing an optional way to do this would be helpful, especially since later projects will use direct writes. My gpio respository uses Go’s module system which will automatically download the rpio-go library when built. Here’s my version of blinker. I won’t be explaining Go sytax as I’m assuming familiarity with Go.
  1 //
  2 // Copyright (c) 2021 Richard Youngkin. All rights reserved.
  3 // Use of this source code is governed by a MIT-style
  4 // license that can be found in the LICENSE file.
  5 //
  6 // Run using 'go run blinkingled.go'
  7 //
  8 package main
  9
 10 import (
 11     "fmt"
 12     "os"
 13     "time"
 14
 15     "github.com/stianeikeland/go-rpio/v4"
 16 )
 17
 18 func main() {
 19     // Initialize the go-rpio library. By default it uses BCM pin numbering.
 20     if err := rpio.Open(); err != nil {
 21         fmt.Println(err)
 22         os.Exit(1)
 23     }
 24
 25     // Release resources held by the go-rpio library obtained above after
 26     // 'main()' exits.
 27     defer rpio.Close()
 28
 29     // Select the GPIO pin to use, BCM pin 17
 30     pin := rpio.Pin(17)
 31
 32     // Set the pin (BCM pin 17) to OUTPUT mode to allow writes to the pin,
 33     // e.g., set the pin to LOW or HIGH
 34     pin.Output()
 35
 36     for i := 0; i < 5; i++ {
 37         // Setting the GPIO pin to LOW allows current to flow from the power source thru
 38         // the anode to cathode turning on the LED.
 39         pin.Low()
 40         //        pin.Write(rpio.Low)
 41         fmt.Printf("LED on, Pin value should be 0: %d\n", pin.Read())
 42         time.Sleep(time.Millisecond * 500)
 43         pin.High()
 44         //        pin.Write(rpio.High)
 45         fmt.Printf("\tLED off, Pin value should be 1: %d\n", pin.Read())
 46         time.Sleep(time.Millisecond * 500)
 47     }
 48
 49     // Turn off the LED
 50     pin.High()
 51 }
Line 15 imports the rpio-go library
15 "github.com/stianeikeland/go-rpio/v4"
The rest of the program is explained through embedded comments. The program can be run typing go run blinkingled.go at the command prompt and hitting enter.
Summary
This article has shown how to configure a breadboard with an LED that can be controlled by programs written in both C and Go. Feel free to suggest changes or ask questions in the comments section below.