Contents
Want to cook a great smoked brisket but don’t want to invest in an expensive smoker or the 8 to 12 hours it takes to cook a brisket in a smoker? This article describes how to cook a great smoked brisket in 3 and 1/2 hours using a Weber Kettle and your oven.
Overview
I absolutely love a good smoked brisket. I guess I never wanted to get a dedicated smoker, I didn’t want to deal with the extra space required and really hoped I could get a good result with a Weber Kettle. Other reasons included:
- Pellet smokers seemed like cheating.
- Electric smokers also seemed like cheating.
- A true offset-smoker would take more dedication to the cooking process than I’m willing to invest in.
So I tried several different ways of smoking meats, including brisket, in my handy 22-inch Weber Kettle.
My first attempt involved using hickory wood chips. Even when soaked in water ahead of time, they basically burn up too fast to give a good smoky flavor to the meat. My second attempt was a little more ambitious. I used a Smokenator Classic which is designed to be used with a Weber Kettle. The problem I had with the Smokenator was temperature control. Due to the small gauge steel used in Weber Kettles adequate temperature control is almost impossible. But it seemed like I was on to something, a combination of indirect heat using charcoal and wood chunks, not wood chips. My current approach is based on a recipe from America’s Test Kitchen. It’s taken me several attempts to get a good result that will work in all weather conditions, but I think I’ve finally got it down. It’s still a bit of guess work to adjust for outside air temperature, wind, sun (or lack of it), and rain or snow, but I provide a few rules of thumb that can help out.
Before getting started it’s worth learning the science behind smoking any type of meat, especially brisket and pork butts. Specifically, the concept of “the stall”. If you really want to get into it deep, I recommend Aaron Franklin’s book (if you’re not familiar with Franklin’s BBQ in Austin, TX, you’re really missing out). Barring that, The Huffington Post has a good article titled Physicist Cracks BBQ Mystery that describes what a “stall” is and why it happens.
Quick Reference
This section is a short overview or reference for smoking a great brisket. It assumes you’ve read and understand the entire article, especially the section on Modifying the Number of Briquettes and Temperature Control.
- One day before cooking, prepare the brisket, trimming as necessary and applying the rub. Place in the refrigerator, wrapped in plastic wrap, when done.
- Two hours before cooking, take the brisket out of the refrigerator.
- One hour before cooking soak 3 fist sized hickory chunks in water.
- 50 minutes before starting the cook, assuming an 80 degree day with no wind, light 36 coals. The bottom vents should be fully open. When fully lit place in coals and wood chunks in the charcoal basket which is placed against the side of the grill. Cover the grill with top vents fully open for 15 minutes. See the section titled Modifying the Number of Briquettes and Temperature Control if the weather is different than specified.
- Place the brisket on the grill fat side up with the thick edge closer to the coals. Replace the cover (top vents fully open) and smoke for 90 minutes.
- After 90 minutes wrap the brisket in heavy duty foil and place in a 300 degree oven.
- Two hours later remove the brisket from the oven and check its temperature. If it’s near 200 degrees the brisket is ready. Let it rest for 30 minutes before serving.
- Enjoy!!!

The result!
Cooking/Smoking Supplies
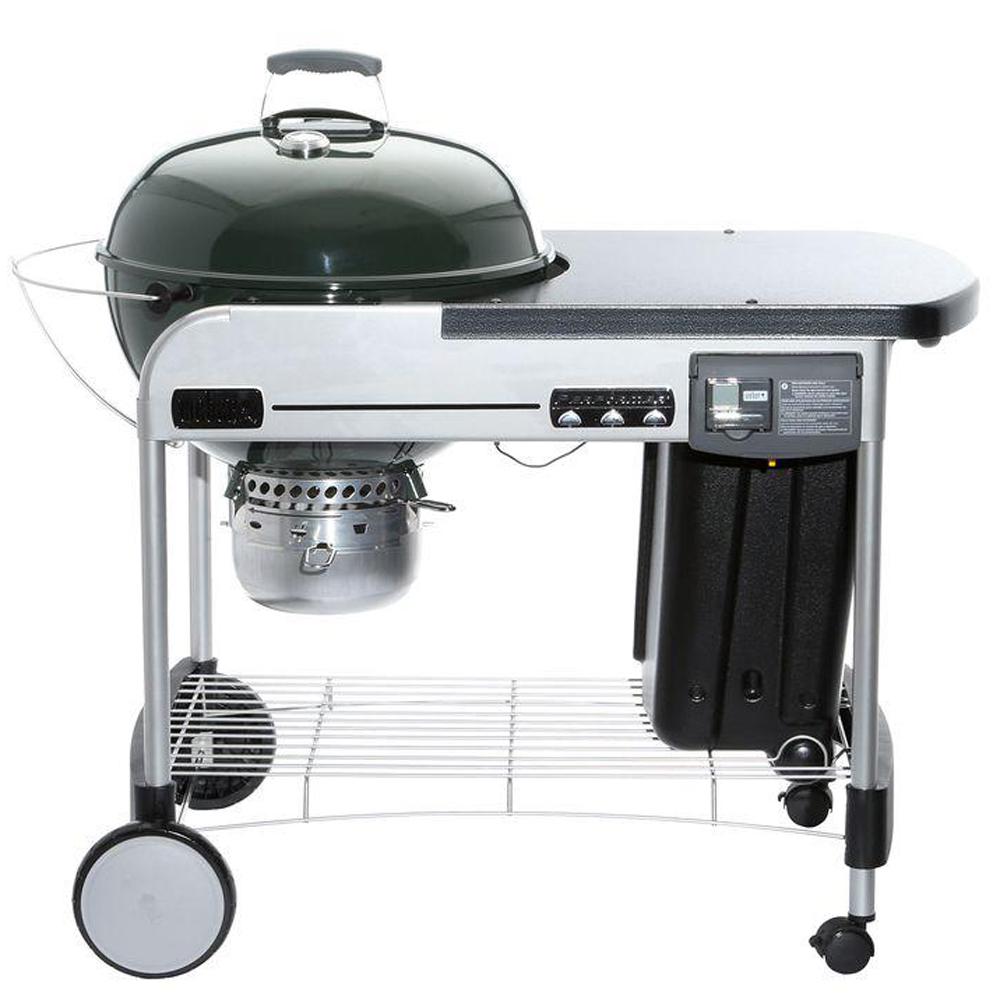
My approach is best suited for a 22-inch Weber Kettle. It will likely work with a knock-off brand Weber Kettle style grill, but may not work with other kinds of grills or smokers (e.g., a Weber Smoky Mountain, Big Green Egg, or an offset smoker). So, here’s the setup you’ll need:
- 22-inch Weber Kettle (mine is a Weber Performer Deluxe)
- I haven’t tested this recipe with grills that aren’t 22 inches in diameter. You may have to adjust the amount of charcoal used depending on whether the grill is larger or smaller than 22 inches.
- Note: whatever grill you use has to have a temperature gauge! They’re not particularly accurate1, but they should be consistent which is what’s important.
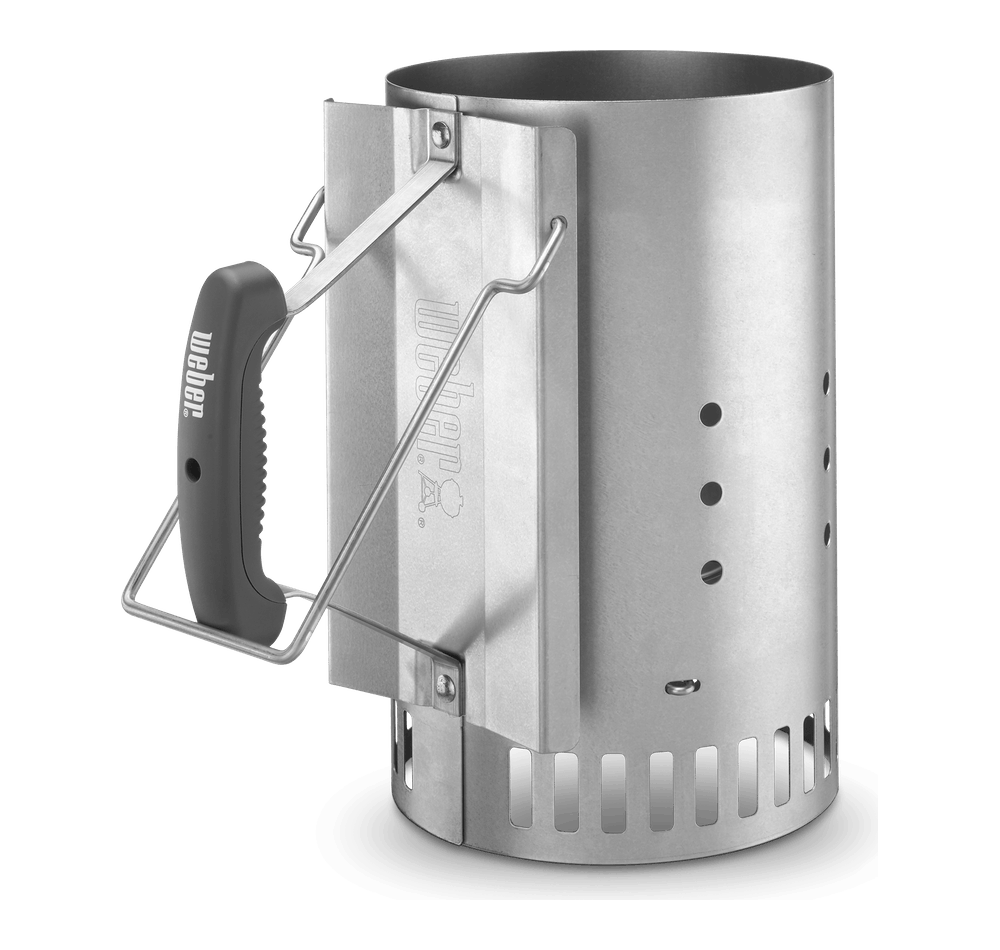
- Large Chimney charcoal starter. Chimney starters are basically a big metal cylinder that holds the charcoal when lighting. It helps start the charcoal burning relatively fast and evenly.
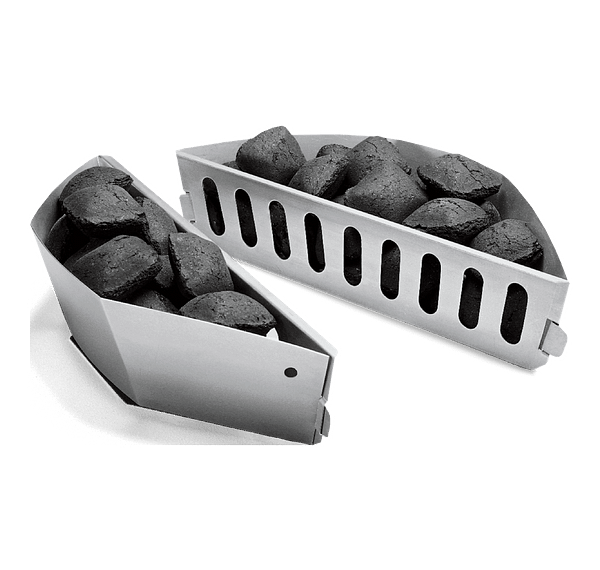
- Char-Baskets. Char-Baskets are basically metal holders for the charcoal used during the cook. They help to hold the charcoal off to the side of the grill when indirect heating is required.
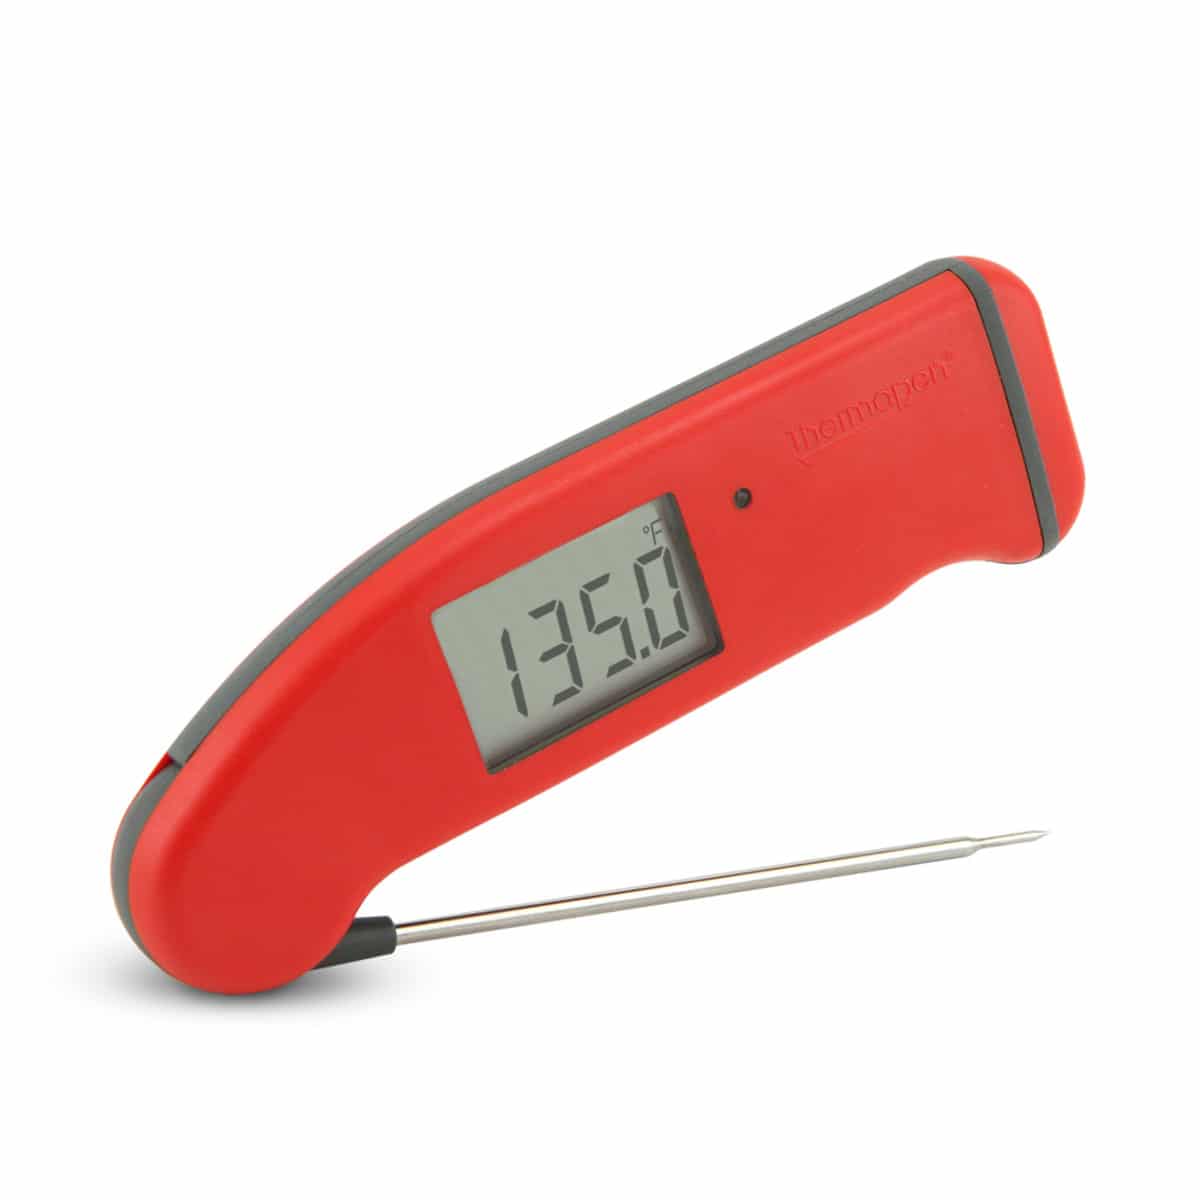
- Instant Read Thermometer
- Heavy-duty aluminium foil (18 inches wide)
- 8”-12” pie tin
- Don’t use a good pie tin as it will get covered with smoke particles (tar). I use a cheap foil pie tin.
- Kingsford Charcoal Briquettes.
- You could use another brand, but don’t settle for an inexpensive brand.
- I can’t recommend using natural charcoal. This isn’t to say you can’t get good results with natural charcoal, some would argue that you would get better results. I just don’t know how much to use and I don’t know how it burns. Also, using briquettes make temperature control easier as they’re all the same size. Temperature adjustments are easy to make.
- Chunk wood, hickory or oak. You can get them at Home Depot or Ace Hardware (or a local grilling or hardware store).
- I use hickory as I like the flavor. I like oak too. Some people use apple wood. I find apple wood imparts a more subtle smoke flavor to the brisket. I prefer a stronger smoke flavor. Whatever you do, don’t use mesquite. Mesquite is good for grilling, but it will impart a very bitter flavor if you use it to smoke anything.
- Spritz bottle filled with water
- A large ball of aluminium foil
Prep
The size of the brisket has a large impact on the grill temperatures throughout the cook. With the method I describe in this article I’ve had the best luck smoking a brisket that weighs about 6 pounds. 4 pound briskets are too small, the grill gets too hot. You can experiment with the number of briquettes to use with a smaller brisket, but I pretty much always use a brisket between 5.5 to 6.5 pounds. If you want to use a larger brisket you’ll likewise have to experiment a bit with the number of briquettes to use. One other thing, briskets larger than about 6.5 pounds may not fit on a 22-inch Weber Kettle.
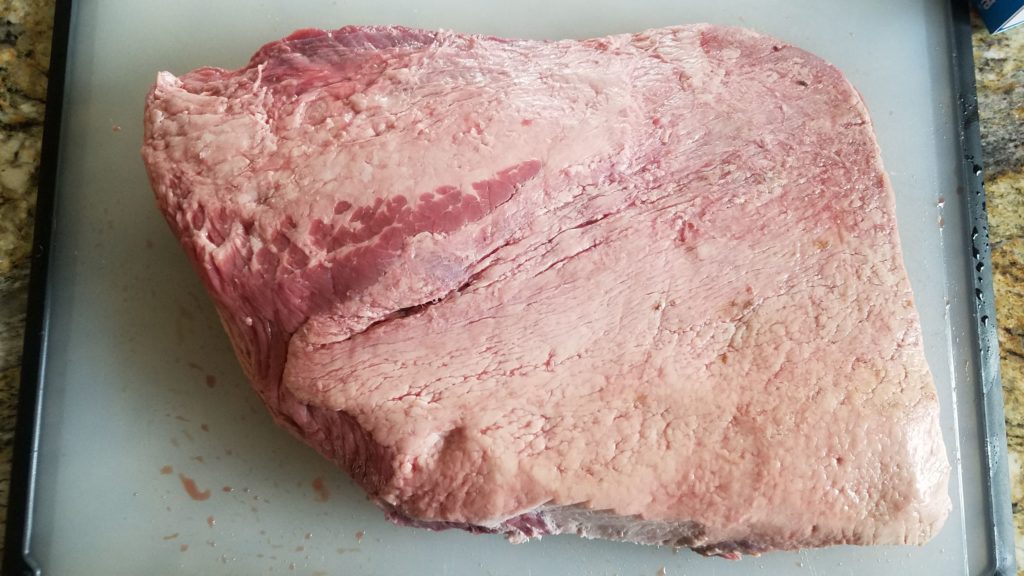
Picking the right brisket is important. Briskets have 2 parts, the flat and the point. This article has a good description of a whole brisket, including pictures that show the flat and the point in relation to each other. The point has a high fat content. Some people like this as it’s more moist, and if you like fat, more flavor. Most briskets in the 6 pound range will only have the flat portion. If a brisket has a point, it will be on top of, and to one end, of the brisket. There will be a layer of fat between the point and the flat. If you get a flat, try to avoid one with a large fat strip running through the middle of the brisket. Also try to find one with a good layer of fat, the fat cap, on one side. A good layer will be about 1/4 of an inch thick. You may not be able to find one with a good fat cap though as most stores tend to trim most of it off. A good fat cap provides a better result, but it’s not strictly necessary. I’ve smoked some very good briskets that had a minimal fat cap. The brisket pictured below has a minimal fat cap. This is likely what you’ll find in the grocery store unless you make a point to special order an untrimmmed brisket.
Rubs are very important to a good brisket. A rub is simply a spice mixture that you rub into the meat. Rubs can contain a variety of spices including chili powder, paprika, as well as brown sugar. I’ve used various combinations of spices and sugars with mixed success. These kinds of rubs can result in a great tasting brisket, and depending on the flavor profile you’re looking for, you might want to try one of these combination rubs. But these combination rubs can go very wrong too. Primarily they can burn which pretty much ruins the brisket. So if you use a combination rub, be aware of this. Franklin’s book, as well as numerous Internet sources, have recipes for these combination rubs. 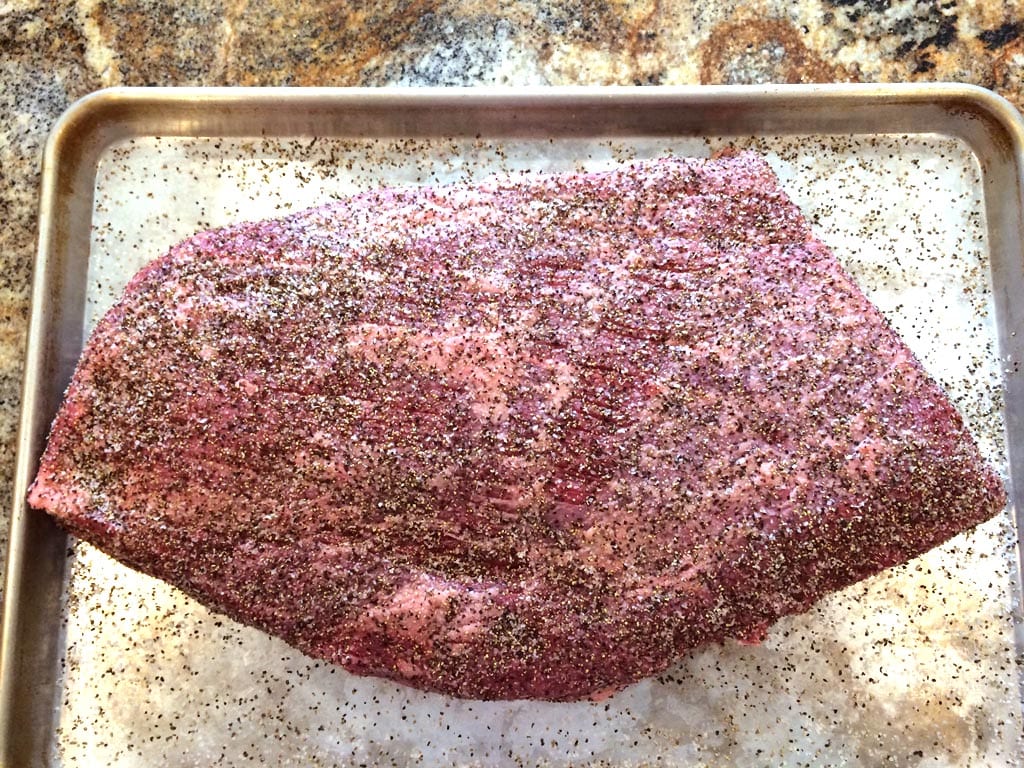
After a lot of experimenting I settled into using a simple rub that’s favored by a lot of my favorite BBQ restaurants (including Franklin’s). I’ve settled on a simple salt and pepper rub. I use a combination of kosher salt and coarse ground pepper, 16 mesh if you can get it (“mesh” refers to the size of the pepper grains). A simple 50/50 mix of salt and pepper can be good but I don’t mix them together before sprinkling it on to the brisket. Instead, I simply sprinkle a light to moderate amount of salt and then a moderate amount of pepper, on to both sides of the brisket. Be sure to rub the mixture into the brisket. I first sprinkle and rub one side of the brisket, turn it over, and do the same to the other side. I don’t mix the salt and pepper together before sprinkling it on to the meat because the salt tends to separate from the pepper leading to part of the brisket being oversalted and the other part having too much pepper.
I generally apply the rub about 24 hours before cooking. Wash your hands in hot, soapy water before handling the brisket. After applying the rub I wrap the brisket in plastic wrap, place it in a shallow baking sheet (i.e., a cookie sheet with a rim) and put it into the refrigerator. Be sure to clean any surfaces and utensils that came in contact with the brisket, as well as your hands, in hot, soapy water.
The Cook
The first thing you need to decide on is when you want to eat the brisket. This determines when you start the cook. It’s easier to have the brisket finish before you intend to eat it. If the brisket is done early it’s easy to keep it in a 370 degree farenheit oven until you’re ready to serve it. If you wait too late to start the cook you could have a lot of people waiting around which is probably harder to deal with. As I said in the overview, the total cook time is about 3.5 hours. When the cook is done (look out, more food science) you’ll need to let the brisket rest for at least 30 minutes. This allows the brisket to finish cooking and to redistribute the moisture throughout the brisket. So now we’re up to 4 hours of cooking and resting. But wait, we’re not done yet. It’ll actually take about 5 hours from the time you start the coals to when the brisket is ready to eat. Here are the details:
- 35 minutes - light the charcoal in the chimney starter and wait until all the coals are covered in gray ash
- 15 minutes - let the grill come up to temperature
- 90 minutes - smoke the brisket on the grill
- 120 minutes - bake the brisket in a 300 degree oven (more on this later)
- 30 minutes - rest the brisket
- 10 minutes - miscellaneous chores between the steps above
All of this adds up to about 5 hours. So if you want to eat at 5pm, you’ll need to start the coals at 12:00pm. The coals should be ready at 12:35pm. The grill will be ready for the brisket at 12:50pm. And so on.
Take the brisket out of the refrigerator about 2 hours before you intend to put the brisket on the grill. This will be about 1 hour 10 minutes before lighting the charcoal. Taking the brisket out of the refigerator lets it come up to room temperature before placing it on the grill. This will in turn will minimize the temperature drop inside the grill caused by the presence of a large piece of cold meat on the grill.
About an hour before starting the coals take 3 fist sized chunks of wood (e.g., hickory or oak) and place them in a bowl of water. Put a plate or a smaller bowl on top to get the wood as covered with water as you can. If you have large hands, pick chunks a little smaller than your fist. You can also use smaller chunks of wood, just try to ensure that they add up to about 3 fist sized chunks. That said, don’t go too small or they’ll burn up too fast, and maybe too hot. At the same time fill the 8”-12” pie pan with water, you’ll need this later.
The next step is to start the coals. Make sure the bottom vents are fully open. As a baseline, assuming an 80 degree, sunny, day with no wind or rain, place 36 briquettes in the chimney starter, and light them (don’t use charcoal lighter fluid!). See this article for more information about using a chimney starter. I’d use newspaper instead of lighter cubes as recommended by the article as newspaper won’t leave any chemical residue on the charcoal. If your using the Weber Performer Deluxe, use the propane starter and place the chimney starter directly over the propane burner. Turn off the propane after about 8 to 10 minutes. About 30 to 35 minutes later all the coals should be covered with a fine gray ash. When this is the case:
- Pour all the coals into one of the charcoal baskets (Char-basket). Place the basket against the side of the grill (hint: Do this before you fill it with the coals!!!)
- Fill the pie pan with water and place it on the bottom grill (i.e., the same bottom grill that’s holding the charcoal basket)
- The water in the pie tin helps with temperature control and the humidity helps smoke particles stick to the brisket
- Spread the wood chunks on top of the coals
- Place the cooking grill into the kettle
- Clean the grill with the large ball of foil. Some people use a grill brush, but I know someone who had a steel bristle from the brush stick to the grill, then it stuck into the meat, and then it stuck into their throat, and then they had to go to the emergency room! So I don’t use a grill brush anymore.
- Put the top on with the vents fully open.
The grill will need 15 minutes to come to temperature, and to reduce the total amount of smoke that the brisket absorbs. During this time remove the brisket from the plastic wrap and prepare to put it on the grill. Be sure to wash your hands (before and after), as well as any utensils and surfaces that came in touch with the brisket in hot, soapy water.
Proper placement of the brisket on the grill is important. Place the brisket, fat side up, with the thinner part of the brisket near the edge of the grill opposite the coals. The thick side of the brisket will be closest to the coals. If the brisket is within a couple of inches of the coals you may want to put some foil between the brisket and the coals. Placing it fat-side up will allow melting fat to flow into the brisket resulting in a more moist brisket. Some people say to place it fat side down to protect the brisket from the heat, but I prefer fat-side up. Feel free to experiment if you’d like.
Put the top back on the grill after the brisket is properly placed on the cooking grill. You should expect to see smoke coming from the vents in varying amounts throughout the cook:
- The smoke will be pretty thick and heavy for the first 15 to 30 minutes
- After 30 minutes the smoke should moderate. It’ll still be very visible, but noticeabily less than than at the beginning of the cook
- After about 45 minutes the smoke from the grill should be very light. Still visible, but noticeably less than before
- About an hour or so after putting the brisket on you’ll likely see no smoke coming from the grill
We’re going to use an oven for the final 2 hours of the cook. This method of smoking a brisket is called the “Texas Crutch”. Some people frown on this and say it’s cheating, but Aaron Franklin doesn’t, so I’m OK with it. Most recipes that use the Texas Crutch place the meat back into the smoker to finish cooking. While this does cut the cook time down, it still takes a relatively long to time to finish the cook, and you have to keep a close eye on the grill temperature and will likely have to put more charcoal in to keep the temperature steady. So I use an oven to complete the cook to simplify things and to speed up the cook even more. Set the oven to 300 degrees (farenheit). The higher temperatures during the smoking portion of the cook and in the oven are key to finishing the brisket in 3.5 hours vs. 12 or more hours required to smoke a brisket in a smoker. Smoking on the grill for the shorter time keeps the brisket from drying out too much due to the higher temperatures used during the smoking portion of the cook.
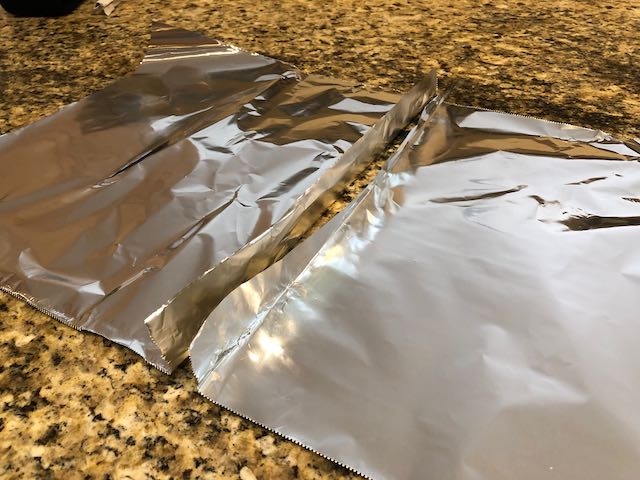
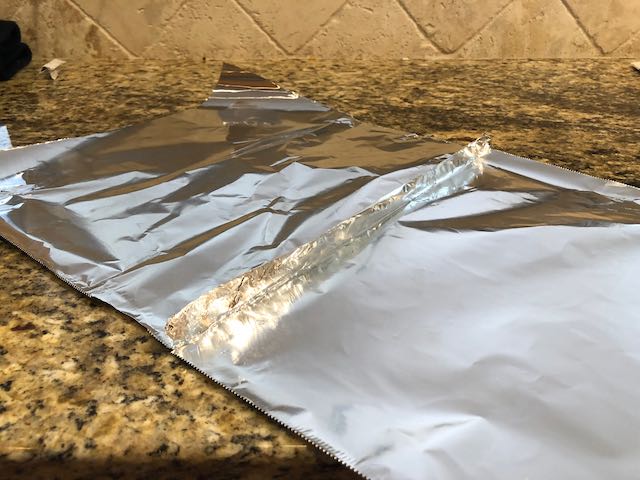
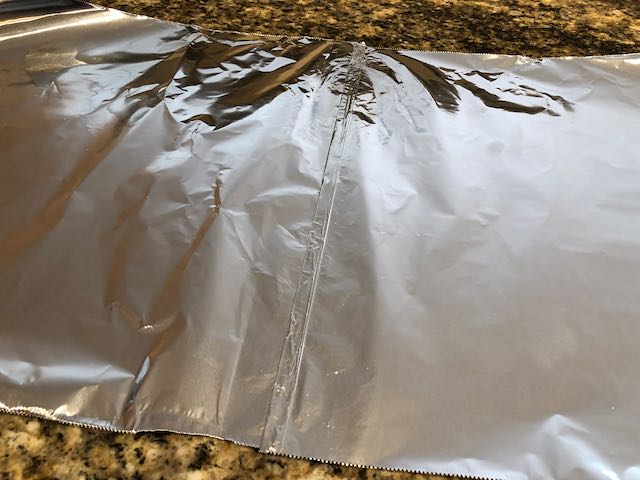
The Texas Crutch requires tightly wrapping the brisket in heavy duty foil. To prepare for this, you’ll need 2 long lengths of heavy duty foil. Make sure the foil lengths are long enough to be able to completely wrap the brisket. Once you have the foil cut to length, join or splice them together along their long sides. To ensure a tight seal I crimp the edges together by folding them over each other several times. You can prepare the foil before the cook, or during the cook. In any case, you’ll need the foil ready to wrap the brisket before taking the brisket off the grill. 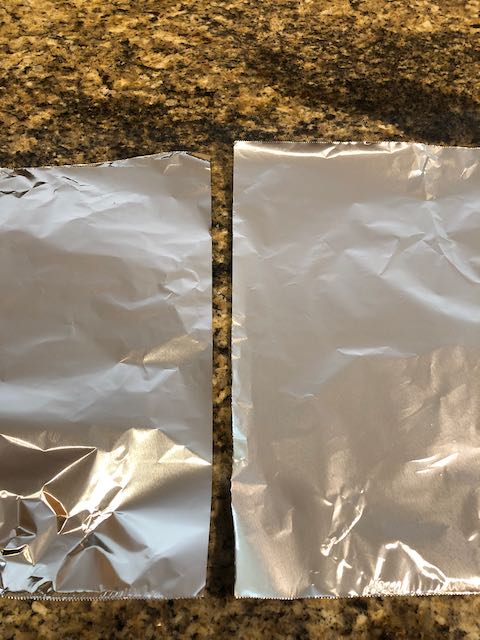
After 90 minutes it’s time to take the brisket off the grill. About 30 minutes before that I spritz the brisket with water. Enough to get the surface wet, but not so much that the water runs off the brisket. About 15 minutes before taking the brisket off the grill preheat your oven to 300 degrees. Once the brisket is off the grill wrap it tightly in the foil you prepared earlier. Be sure to seal the foil tightly so no moisture will escape during the remainder of the cook. This is required for 2 reasons. First, to get past the stall (did you read about the science of smoking brisket?) you’ll need to keep the brisket tightly sealed in the foil. Second, the brisket may dry out if you don’t. 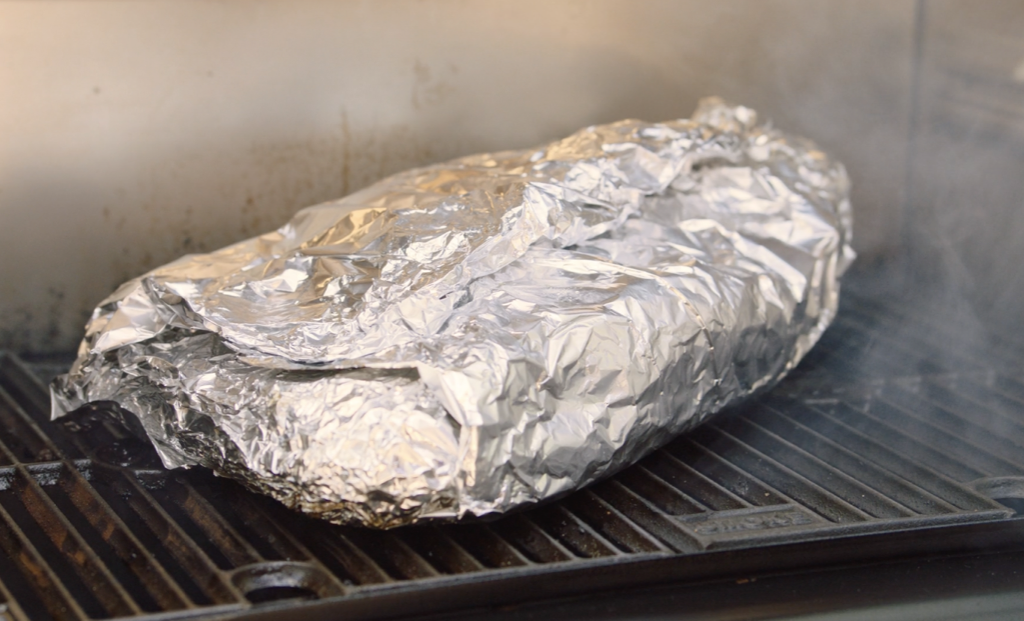
Two hours later the brisket is ready to take out of the oven. To ensure it’s fully cooked, partially unwrap the brisket, taking care not to burn yourself on the steam that will escape. Use the instant read thermometer to take the temperature of the brisket in its thickest section. The temperature should be around 200 to 203 degrees farenheit. This temperature is important. If it’s not near 200 degrees it will either be tough (too cool), or dry (too hot). If it’s not hot enough, rewrap the brisket in the foil and cook it for a bit longer, but not too long. Another hour would be too long, but 15 minutes might be enough. If you live at high altitude, i.e., more that 6,500 feet, you probably won’t be able to get the brisket up to 200 degrees. At some point, probably the boiling point of water at your altitude, it’s not going to cook any more. You will have trouble getting the temperature high enough at about 7,500 feet or higher. The brisket will still taste good, but it’ll likely be a little tough. See the articles on the science of cooking briskets if you want more information on why 200 degrees is such an important temperature.
Once the brisket is done you need to let it rest for at least 30 minutes. To do this I rewrap the brisket in foil and let it sit outside the oven. If you’re going to be serving the brisket more than an hour later it’s OK to put it, wrapped, in a 170 degree farenheit oven until you’re ready to serve it.
Pro tips:
- Slice the brisket against the grain. Generally speaking, this means slicing across the width of the brisket, not the length (See the photograph above).
- Slice only the amount of brisket you intend to serve. Once sliced the brisket will tend to dry out.
- To reheat, place in a 300 degree oven for about 30 minutes or until heated througout.
Modifying the Number of Briquettes and Temperature Control
Regarding how many charcoal briquettes to use, the number will vary with temperature, wind, sun, and precipitation. Since Weber Kettles use such thin gauge metal temperature control can be difficult. As I mentioned above, the baseline is an 80 degree (farenheit), sunny day with no wind. The number of briquettes to use in these conditions is 36. The following rules of thumb can be used for different conditions:
- Add 1 briquette for every 10 degrees of temperature drop from the 80 degree baseline
- Subtract 1 briquette for every 10 degrees of temperature increase from the 80 degree baseline
- Add 1 briquette for a windy day
- If the temperature is above 90 degrees and the day is sunny, subtract an additional briquette
- If it’s lightly raining or snowing, add 1 briquette. If the rain or snow is heavy you probably don’t want to smoke anything. In any case, I don’t have a good rule of thumb for how to account for heavy rain or snow.
Here are some examples:
- A windy, sunny day with temperatures in the high 60s to low 70s - use 38 briquettes
- A calm sunny day with temperatures in the 30s - use 41 briquettes
- A calm sunny day with temperatures in the low 90s - use 34-35 briquettes
Using these rules you should see the following grill dome temperatures during the cook 2:
- 330 degrees +/- 10 degrees - 15 minutes after putting the top on the grill
- 340 degrees +/- 10 degress - 15 minutes after putting the brisket on the grill
- 320 - 340 degrees - during the cook
- 300 degrees - towards the end of the cook
Closely watch the temperature during the first 15 minutes of the cook. Don’t worry too much if the temperatures are below, but not too far below, these ranges. As long as smoke is coming out of the top, we can make up for the lower cook temperatures later on. We do want the temps to be above 300 degrees though. Briefly take the top off for a bit if the temperatures are below this. DO NOT let the wood chunks start on fire. Put the grill top back on if this happens. You might need to gently(!!!) spritz the wood chunks with a water mist if they do catch fire.
If the temperatures are above these ranges they’ll need to be lowered before they get out of control. The best way to do this is to partially close the top vent. At 350 degrees or above try closing the top vent to 75% open and watch the temperature closely. If this results in a temperature drop leave it there until temperatures come down to about 345 degrees then open the vent to 100%. If the temps don’t drop or continue to rise close the vent to 50%. If the temps still don’t drop close the top vent to 25%. If this doesn’t work you’ll need to completely close the top vent. This is dangerous though. You don’t want to suffocate the coals as the temperature will rapidly drop and the coals may not be able to bring the grill back up to temperature after the vent is re-opened. It’s best not to let the grill dome temperature get out of control as it can be hard to get it back into range. So, the point is to closely watch the temperature during the first 15 minutes of the cook and take action as soon as it gets out of range. If the temperatures remain too high it’s possible you might have to leave the top vent partially closed during the first part of the cook.